


Before & After: Here's How We Converted Our Garage Into a Bright, Cozy Art Studio
You guys! I am so excited to share with you all the details of our garage transformation! This project was easy, budget-minded, and the results are just what we wanted. So satisfying!
BEFORE: My First Art Studio Was A Closet!
This was my old studio which used to be the laundry room / bedroom closet. Literally our clothes are behind the curtain!
In the beginning this little room more than met my needs. I remember this time fondly: I was just starting out as an artist and so excited to have my very own creative space! This closet worked out fine because I only had a small line of cards & prints.

It was cozy! But a little dark with only one window. And as our art business grew, the shipping supplies eventually spilled out into our bedroom, product storage bins overtook the garage, and we even had to annex part of our daughter's bedroom after she left for college to keep it all under one roof!

After a few years of increasingly blurred lines between home and work, we realized that we needed to untangle our work space from our living space and reclaim our dining room table!
We knew that if we wanted to continue to have our business inside our two bedroom home, we would need to be more strategic.
And then it happened...
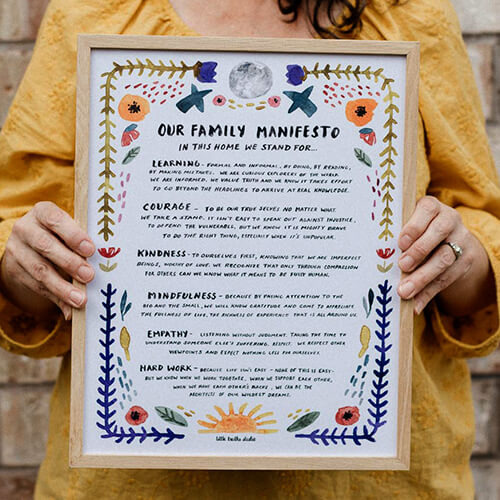
Our ABCs of Life art print went viral and it kicked our little businss into overdrive! Overnight we needed to drastically change our workspace.
We Needed More Space! What Were Our Options?
We considered several options for a new home art studio:
1. Renting a studio space outside our home. Honestly I didn't really consider this option as we lived in a rural area and adding commute time to work in the city again didn't appeal to me.
2. Building a separate studio on our property. We considered building a small studio like an ideabox on our three acre property but ultimately this was going to be outside of our budget.
3. Adding a room onto our home. Again, way outside of our budget limitations.
4. In the end we decided to go with the most economical option, which was remodeling our 2.5 car garage. And I'm so glad we did because the pandemic hit right as we began the remodel and that further constrained our budget.

Step 1: Clear Out The Garage & Decide How To Store What's Left
I cannot stress to you how much crap lived in our garage!
The biggest undertaking was to examine every box and bin and decide,"does this bring us joy?" Alas, a lot of it did not, and so much of it was donated or given away. It's amazing what you're willing to part with when a brand new studio is within your sights!
We also built a small shed on our property to store things we wanted to keep like BBQ supplies, camping gear and our kayak.

Step 2: Demolition & Design
My husband Bert did all of the demolition work, removing the small, purposeless interior room and all of the old, damaged cabinetry.
Then we needed to decide how to set up and organize the space.
Keeping the laundry area in the garage posed a minor design challenge, how to keep that space functionally separate. We essentially decided to surround the laundry area with metal bookshelves for extra storage, and use a room divider for visual separation.

Step 3: Insulation & Drywall
Deciding to convert your garage into an art studio means preparing it to be usable and comfortable all year round. Insulating your garage isn’t just about warmth—it helps regulate temperature, reduce moisture, and protect your supplies from damage.
Next we had the drywall finished and textured before painting them a nice, bright white. No more dark, dreary studio!

Step 3:The Glass Garage Door- My Favorite Part!

The one thing I knew from the beginning was that I wanted a glass garage door to bring in tons of natural light. Since our home does not face the street, we now have a view of the driveway surrounded by forest. Parking our cars on another part of our property allows us to use the driveway as a patio area.

Our Garage Remodel Budget
- Demolition work- $0
- Drywall- $3500
- Insulation- $2,000
- Garage Door- $4,800
- Furniture & Storage- $2,000

Furnishings & Storage:
Sundance Console (similar to this one)
Pole to hang outdoor string lights
Ikea storage and filing cabinets


Learnings:
Our home is surrounded by tall trees that filter the sunlight throughout the day. So we learned that when it's cooler outside we benefitted from using a small space heater to help warm the chillier mornings.
The studio stayed pretty comfortable throughout the summer, despite the afternoon heat, helped by the concrete floors, insulated walls, and tree shade. As I tend to do most of my work early in the day, the warmer afternoons were never an issue, anyway.

BEFORE:

AFTER:

We used black pipe from a plumbing supply to hang white canvas drop cloths from the ceiling in the back of the studio.
These conceal the industrial shelving units we use to store merchandise and a few miscellaneous household items that still needed a place to live. We hung a gray canvas drop cloth across the back of three smaller storage shelves that face into the laundry area on the other side. This creates a soft "wall" effect and visually "encloses" the sitting area.

I have to say I'm thrilled with this new space! Being able to "leave" my house and "go to work" every day, separating my work life from my home life, has been worth every penny. And being able to work with my canine and feline roommates is just icing on the cake.

P.S. We have since moved from this property to Paint Water Farm and completely remodeled that studio space as well. You can tour that studio here and see some very satisfying before and after photos!